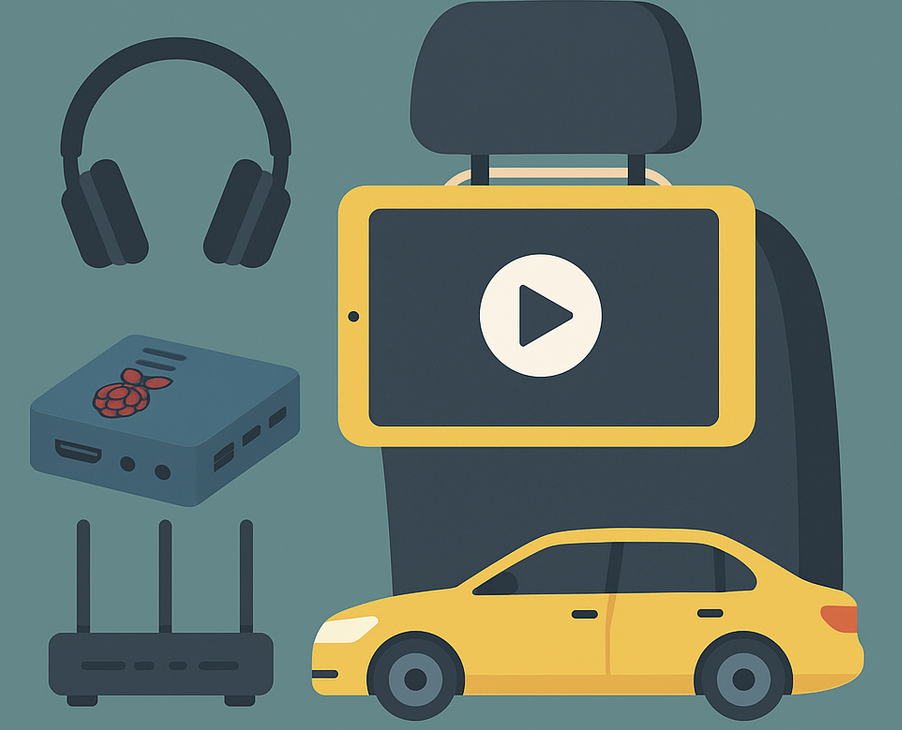
Last summer, I built a simple yet effective in-car entertainment system for our kids. We had a long road trip ahead of us – hours of driving to reach our summer holiday destination – and traditional car games like “I spy” or license plate spotting just weren’t going to cut it for a five-hour journey.
To solve that, I turned our car into a mobile streaming cinema and here’s how you can too.
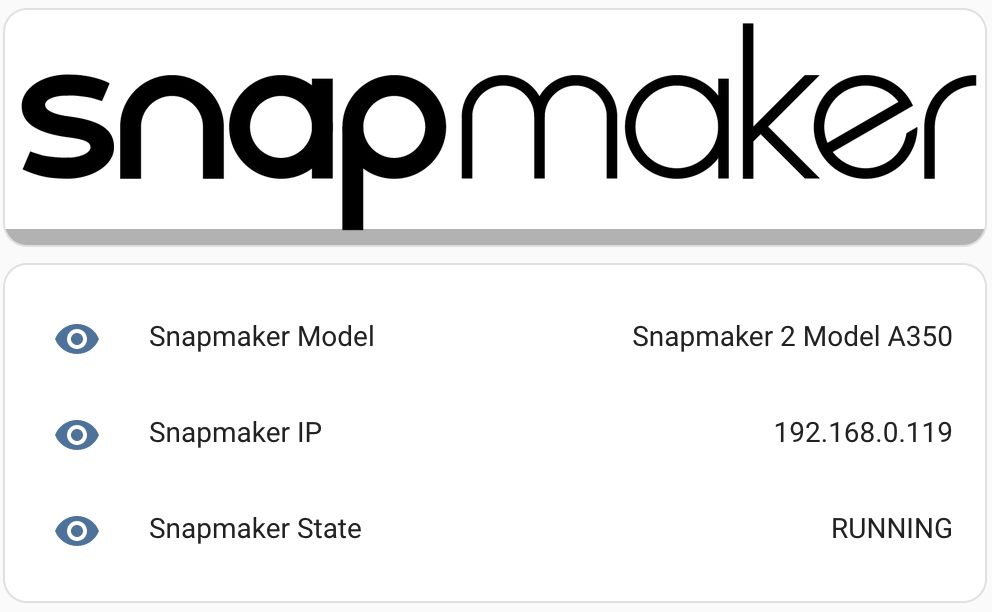
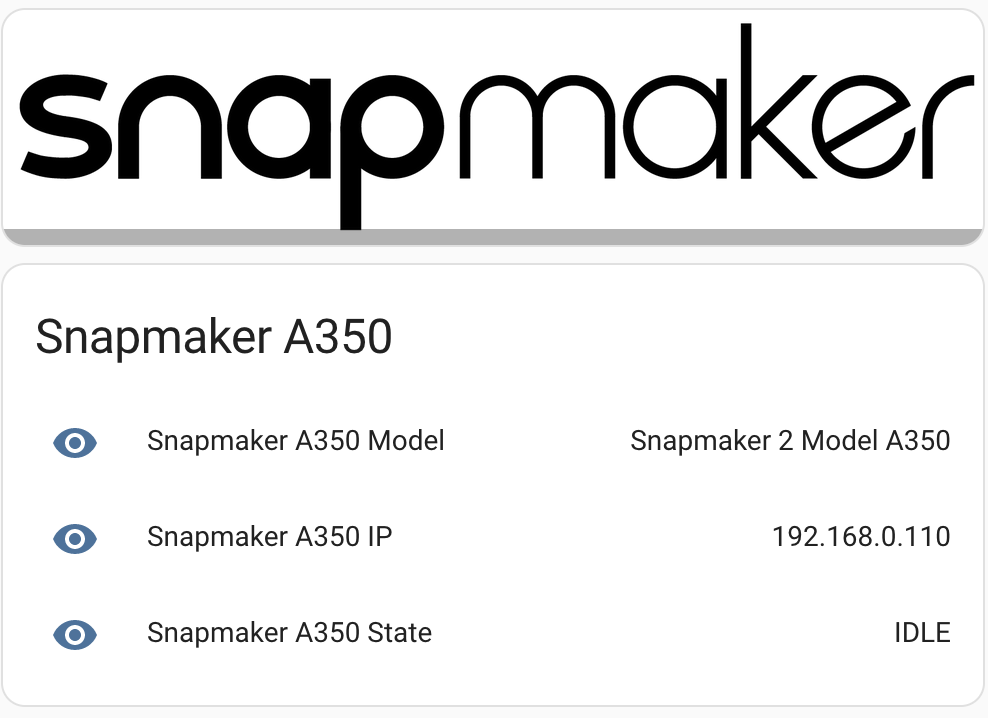
Did you know that it’s possible to discover your Snapmaker 2.0 in your LAN? Just send an UDP discover Broadcast to Port 20054 and your Snapmaker will reply with his IP-Address, Model-Name and Status.
Update 19.01.2024: This project got some reactions, see here: HomeAssistant-Forum and here: Snapmaker-Forum Meanwhile I created a new Script V2 which gets more Information from the Web-API, this makes the information below obsolete. -> See new code on github Maybe I will try to write a HomeAssistant Integration someday….
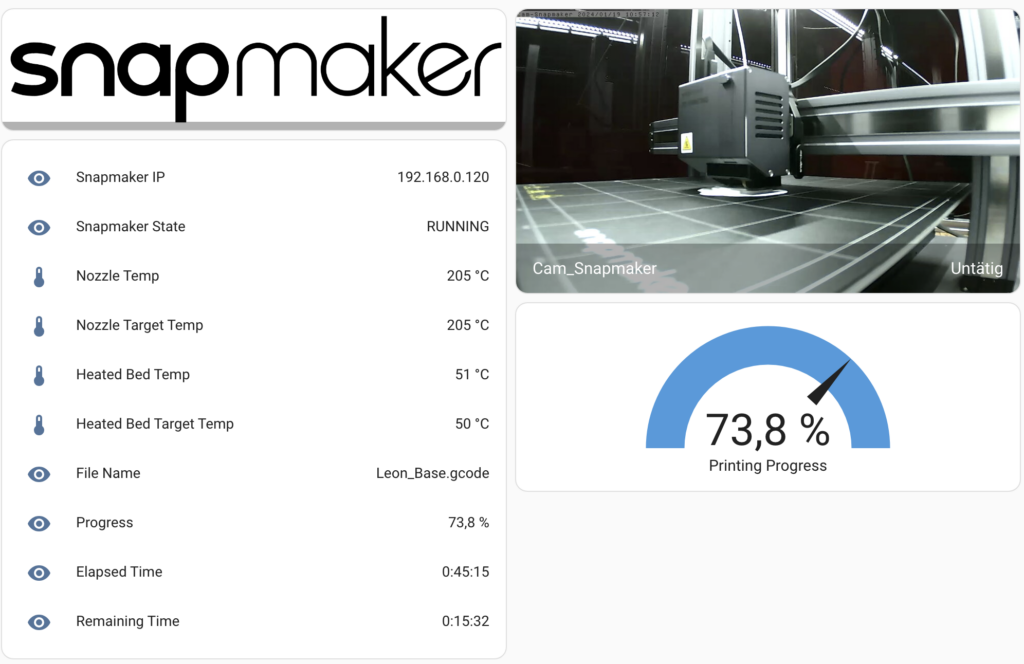
With this function, I inform my Home Assistant about the state of my Snapmaker. Home Assistant sends me a push-message if the 3D-Print, Laser-Cut or CNC is finished. Because I only need this information, it’s not necessary to login, get info and logout to the Snapmaker. Maybe I will write another script in future to read other values like process, temperatures, enclosure state etc.
Here is an example of my webhook-sensors in templates.yaml: (For more details see this Link)
Then download the code on github and edit the python-script to your needs. Run it in a cronjob, I do that on a separate raspberry-pi for example every 5min.
I hope this will help you to get at least some information from your Snapmaker to Home Assistant. I still hope that we can get more information in future from an usable Snapmaker-API 😉
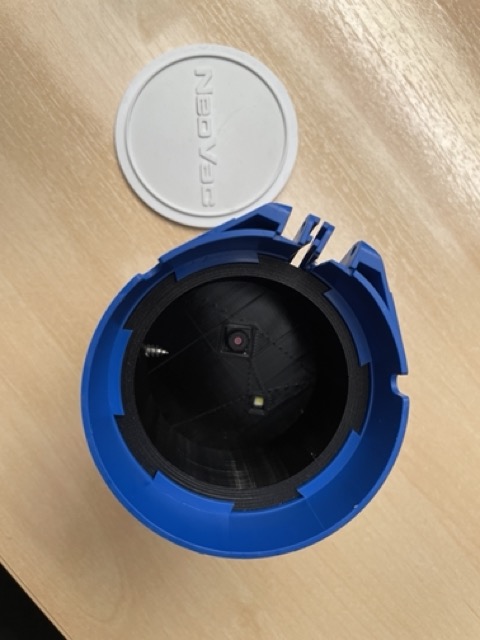
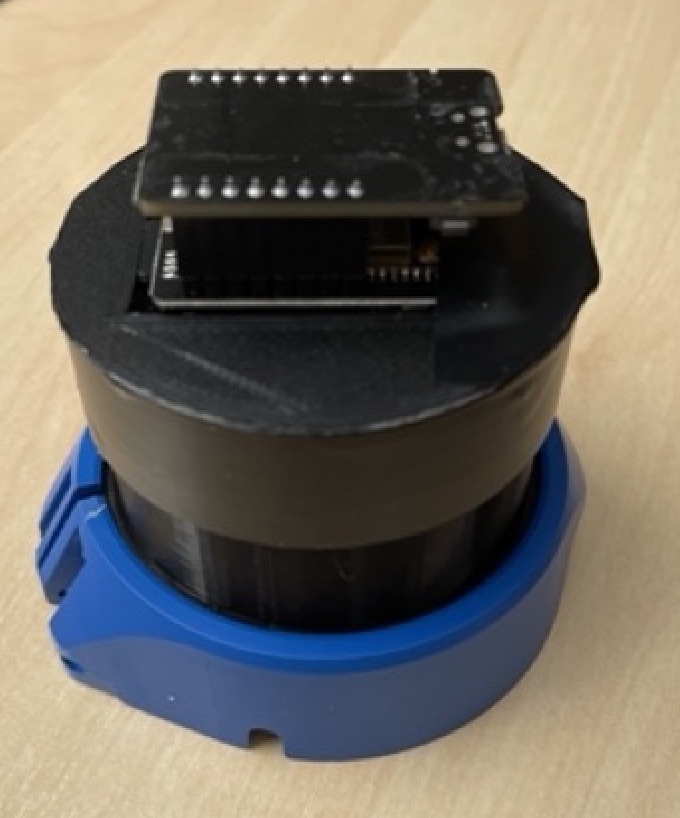
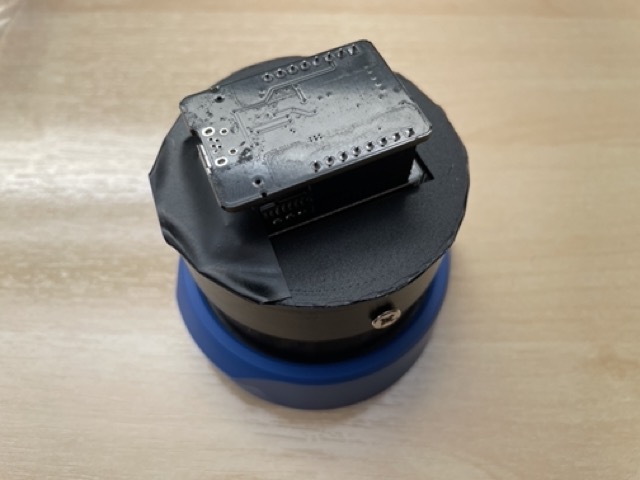
Beim Neovac den blauen Deckel abmontieren und dann den weissen Einsatz entfernen. Der untere Zylinder wird dann neu anstelle des weissen Einsatzes eingeklemmt. Der Deckel als Halterung für den ESP32 wird dann einfach über den Zylinder gestülpt und seitlich mit einer Schraube fixiert. Auf dem ESP32-CAM muss der Fokus angepasst werden.
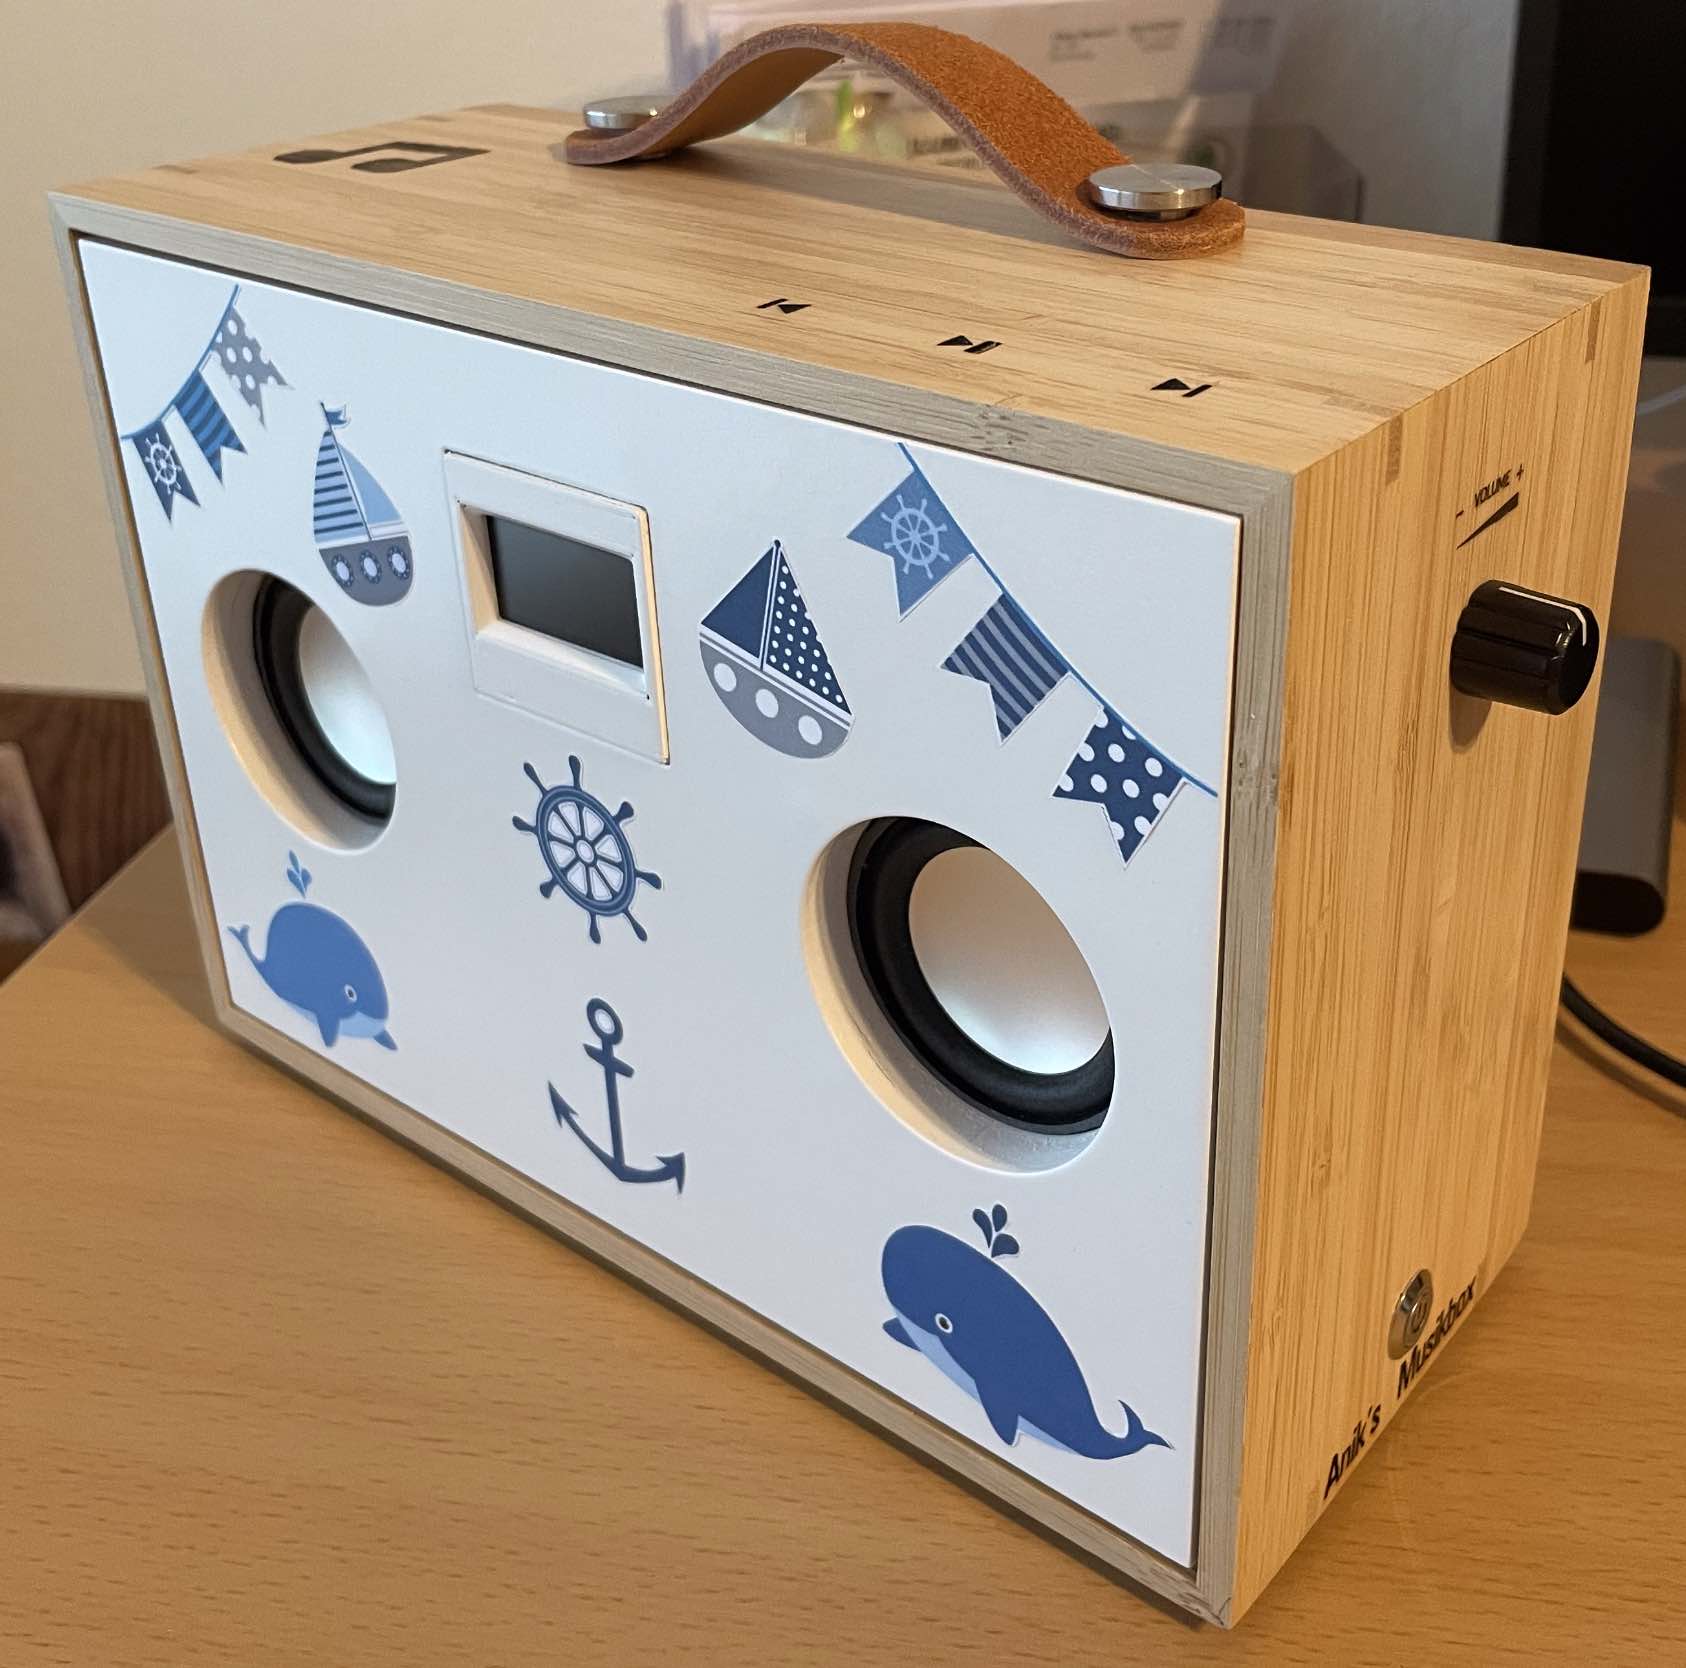
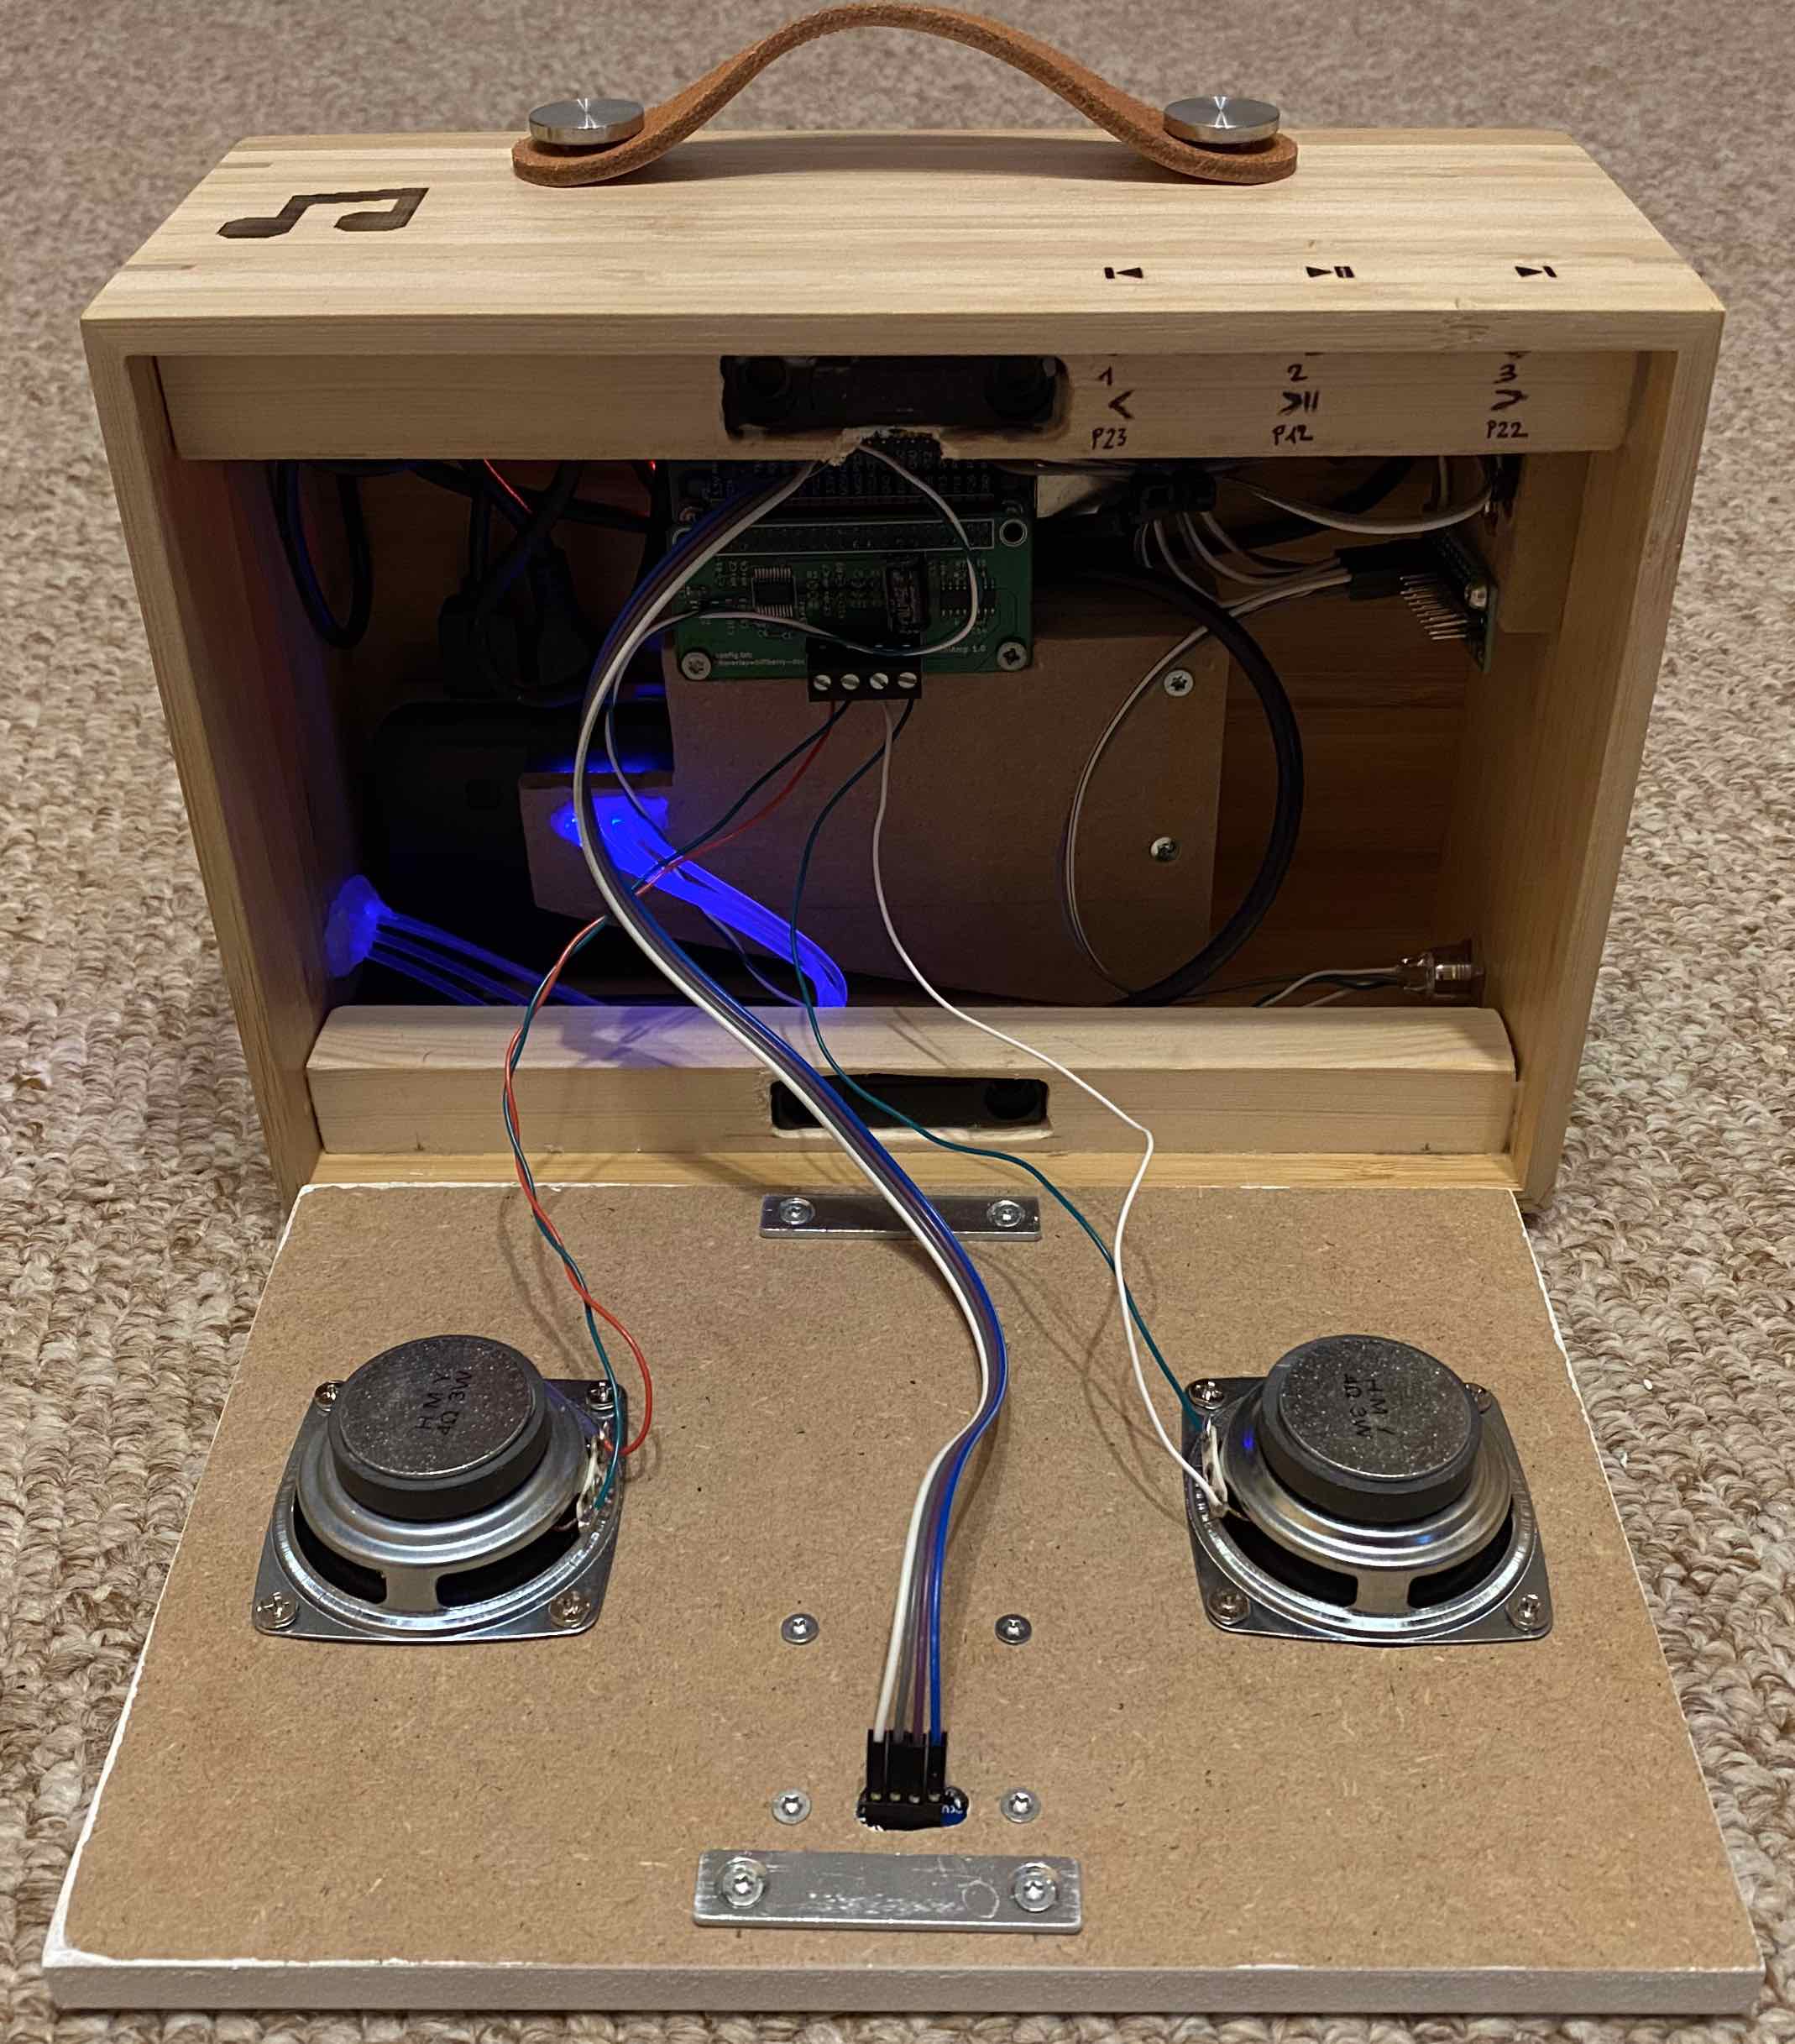
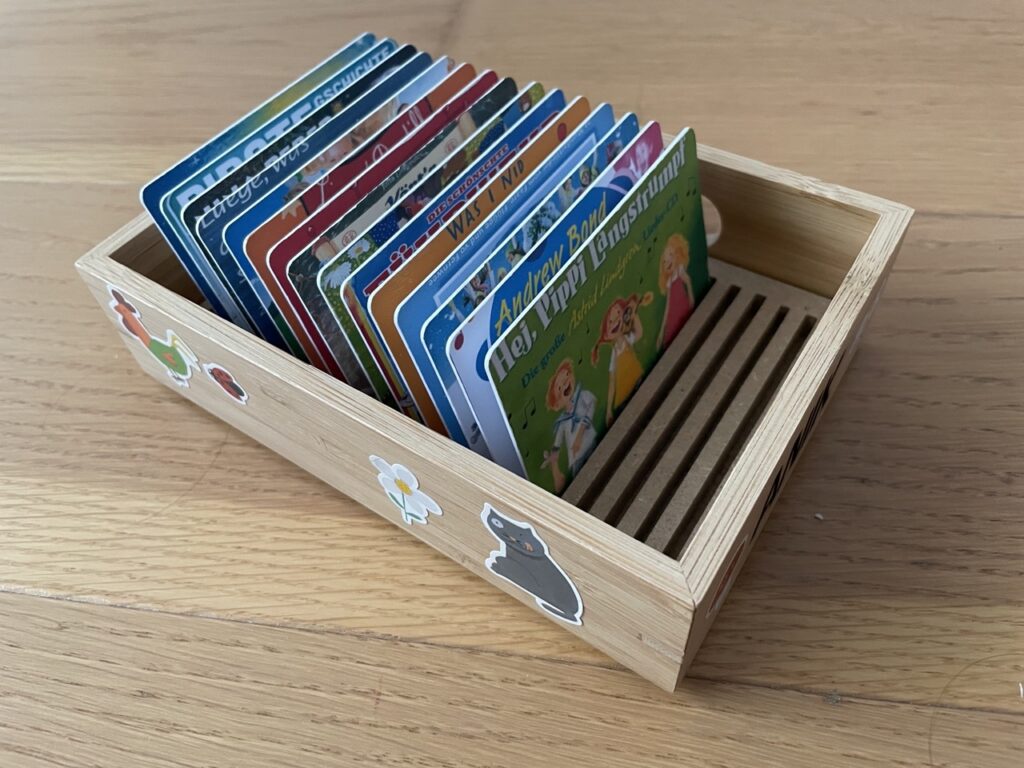
Ich habe unserer Tochter zu Weihnachten eine Phoniebox gebaut. Grundsätzlich findet man alle nötigen Informationen auf der Webseite der Phoniebox, ich beschreibe hier rudimentär die Schritte die ich gemacht habe und die verwendete Hardware. Die Front wurde gefräst, der Rahmen vom OLED-Display mit PLA gedruckt und die Symbole gelasert, alles mit dem Snapmaker 2.0 A350. Zusätzlich habe ich aus einer Schublade vom Dragan eine Aufbewahrungsbox für die RFID-Karten gemacht.
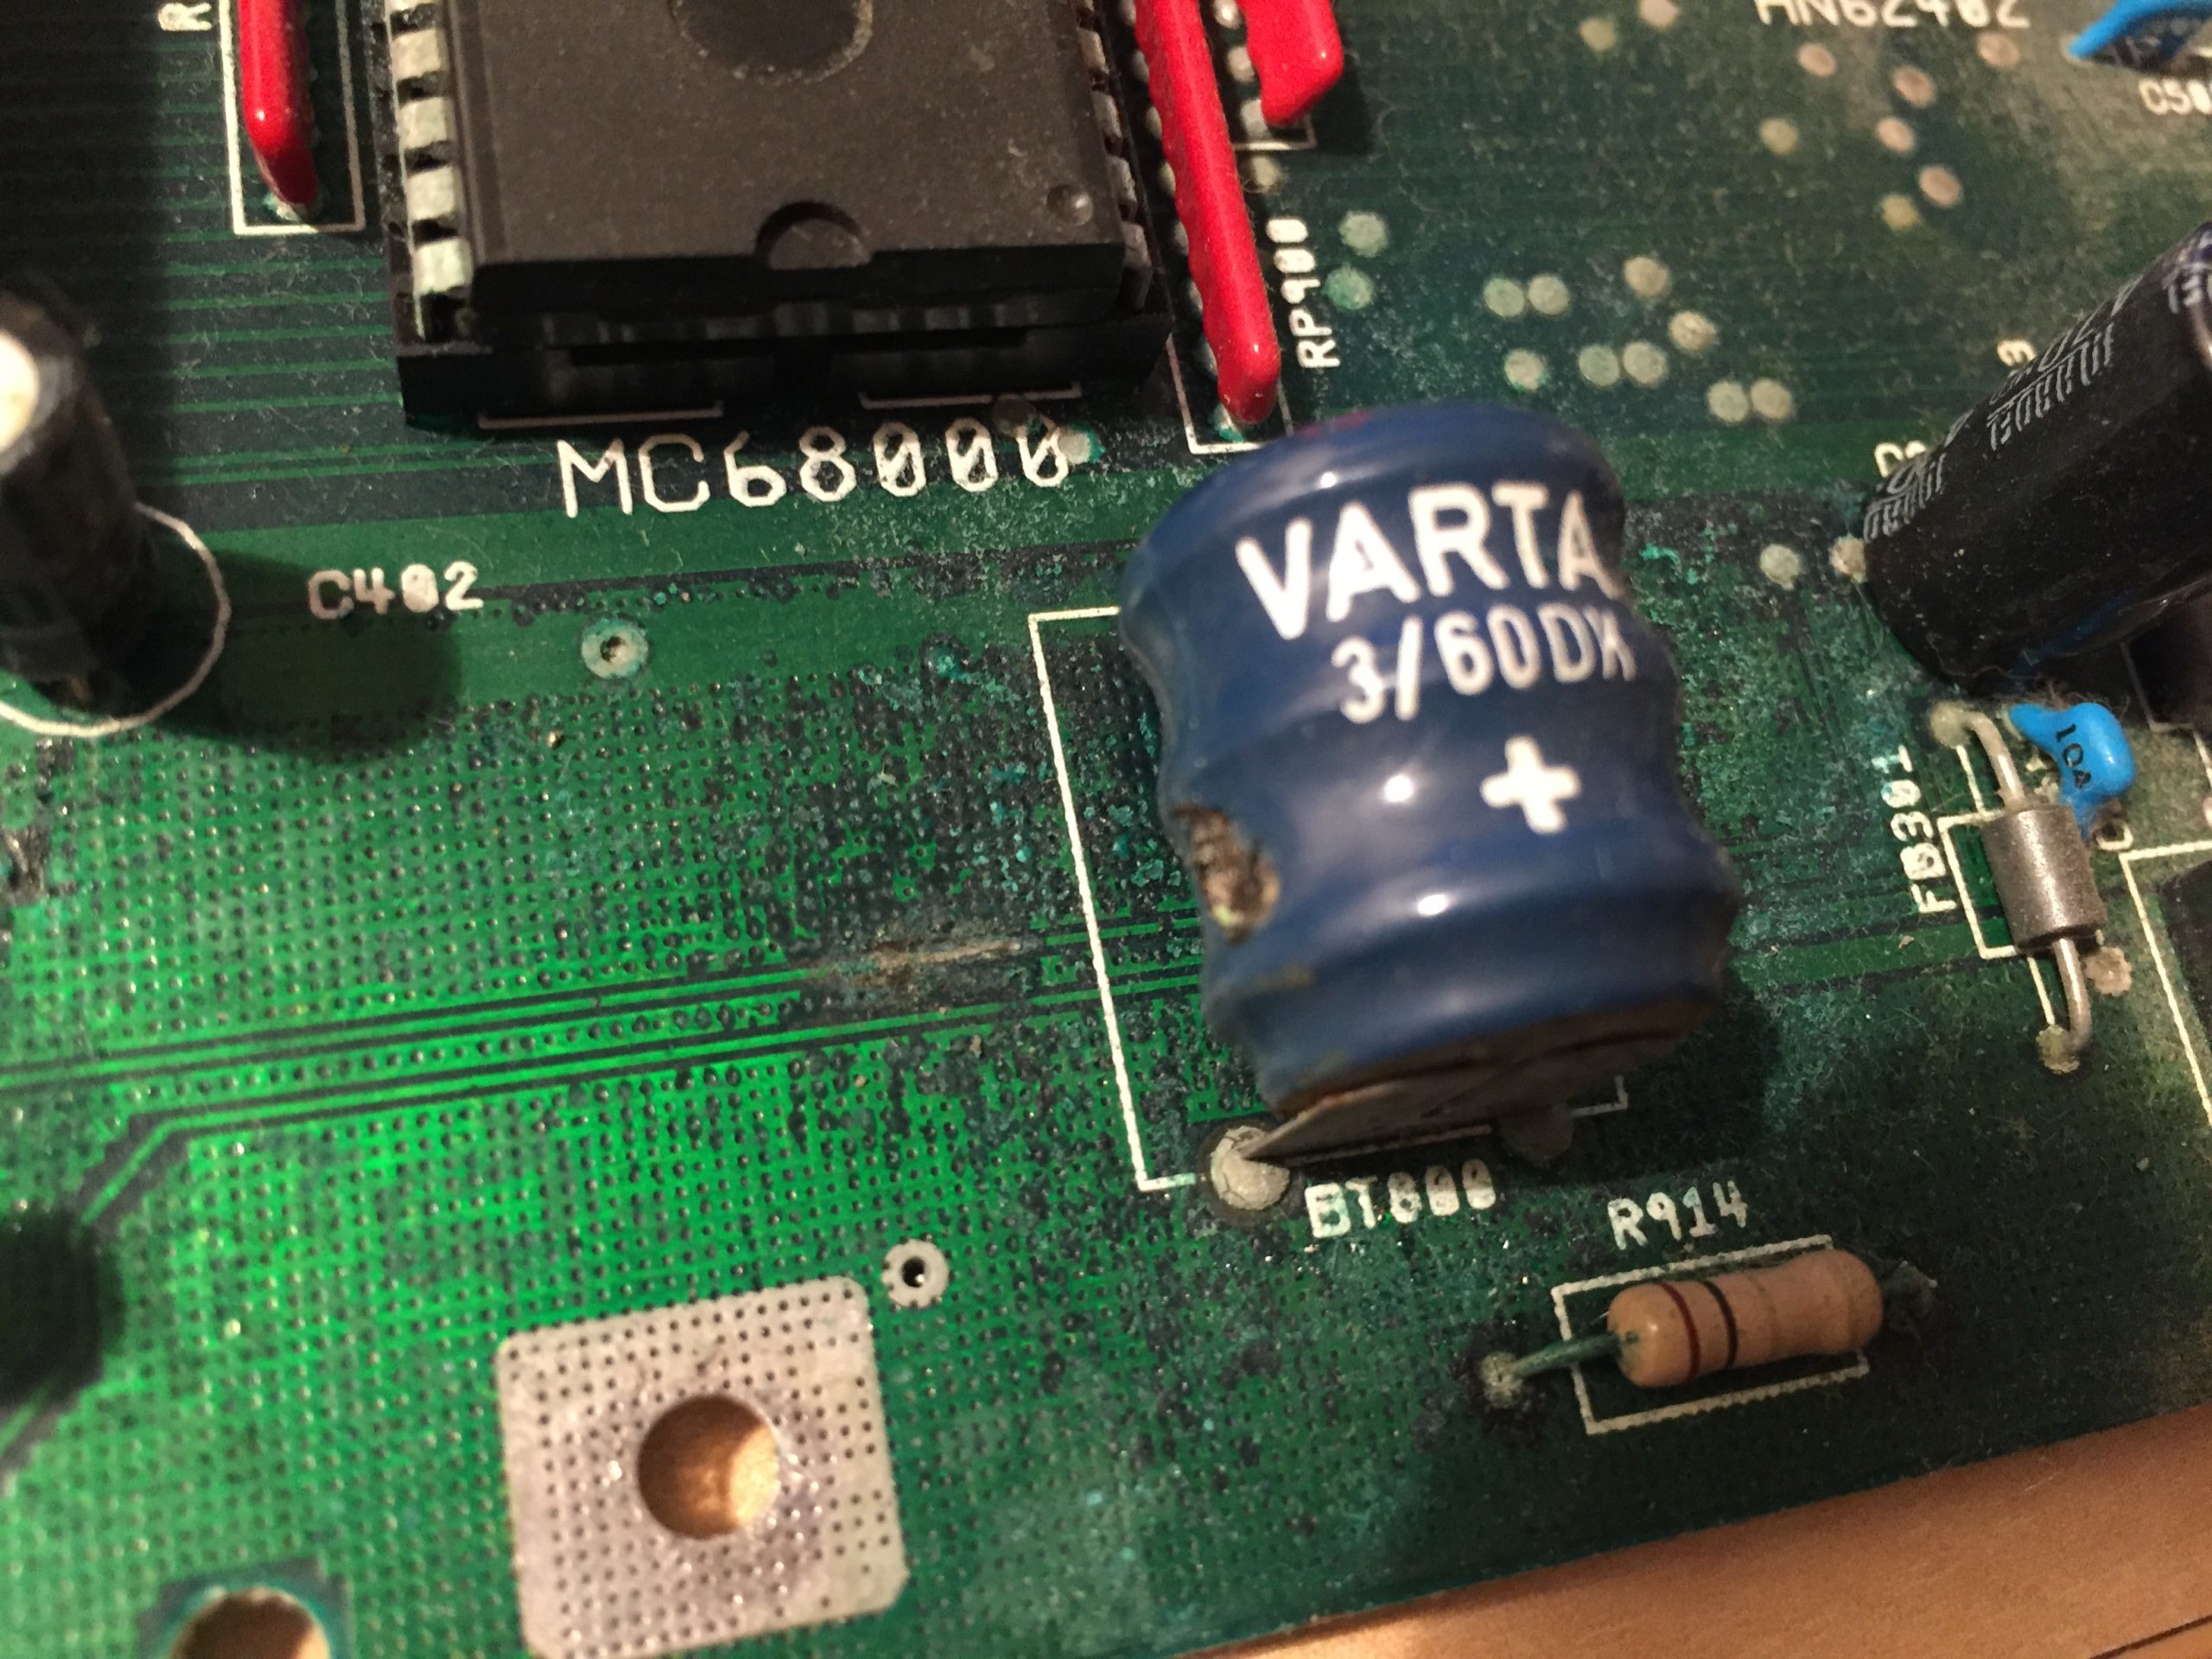
14.11.2019: Heute habe ich mit Schrecken festgestellt, dass mein Commodore Amiga 2000 aus dem Jahre 1987 nur noch einen grünen Bildschirm zeigt. Google meinte der Blinkcode deute auf einen RAM-Fehler.
Ich hatte das Problem bereits einmal, da half es die Chips Denise, Gary, Paula, Fat Lady/Fat Agnus, Kickstart und CPU besser in die Sockel zu drücken, danach lief er wieder. Diesmal nicht.
Nach näherem Betrachten habe ich gesehen, dass die Batterie geplatzt ist und dadurch eine Leiterbahn auf dem Board zerstört wurde. Auch fängt es überall um die Batterie an zu korrodieren:
Ich gehe mal davon aus dass dies der Auslöser des Problems ist. Nun werde ich versuchen in den nächsten Tagen das Board zu reparieren.
Ich bestelle erstmal einige Ersatzteile und berichte dann über meinen Versuch, den Amiga zu retten. Der Austausch des Lüfters, der Einbau eines HDD-Controllers und eine neue Kickstart Version 3.1 ist auch geplant. Momentan ist noch Kickstart 1.2 drauf. Updates folgen…