This Post describes, how to install the UniFi Network Server as Docker image on a QNAP NAS.
The first step is to make sure you’ve installed Container Station from the QNAP App Center.
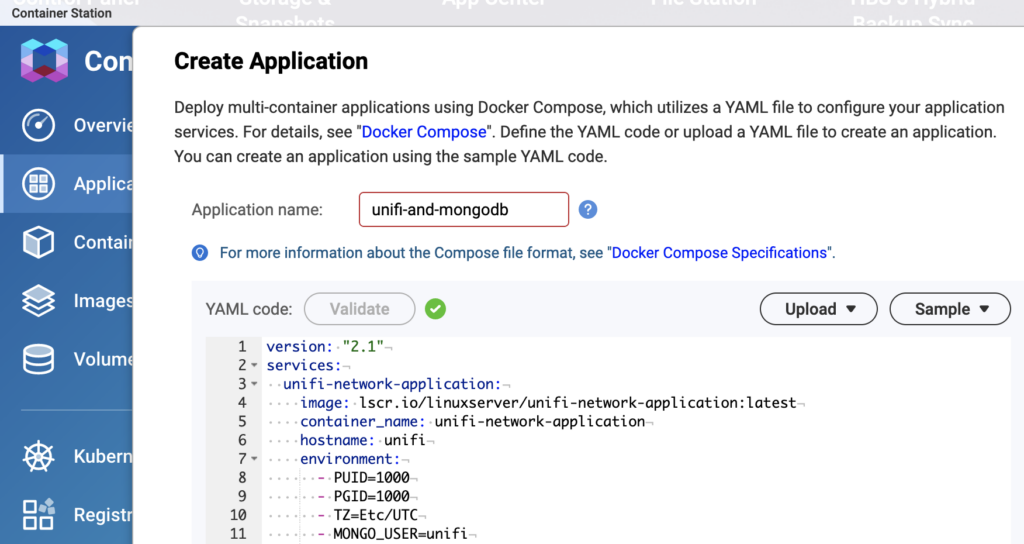
After this, open Container Station, go to “Applications” and click “Create”.
Give your application a name, for example “unifi-and-mongodb”.
Upload this yaml-code for docker-compose, replace “UNIFIPASSWORD” with a secure password, you will use this later to configure the database:

version: "2.1"
services:
  unifi-network-application:
    image: lscr.io/linuxserver/unifi-network-application:latest
    container_name: unifi-network-application
    hostname: unifi
    environment:
      - PUID=1000
      - PGID=1000
      - TZ=Etc/UTC
      - MONGO_USER=unifi
      - MONGO_PASS=UNIFIPASSWORD
      - MONGO_HOST=mongodb
      - MONGO_PORT=27017
      - MONGO_DBNAME=unifi
      - MEM_LIMIT=1024
      - MEM_STARTUP=1024
      - MONGO_TLS=false
    volumes:
      - /share/CACHEDEV1_DATA/Container/container-station-data/lib/docker/volumes/unifi/:/config
    ports:
      - 8443:8443
      - 3478:3478/udp
      - 10001:10001/udp
      - 32778:8080
      - 8880:8880
    restart: unless-stopped
    depends_on:
      - mongodb

  mongodb:
    image: mongo:4.4.25
    container_name: mongodb
    hostname: mongodb
    volumes:
      - /share/CACHEDEV1_DATA/Container/container-station-data/lib/docker/volumes/mongodb/:/data/db
      - /share/CACHEDEV1_DATA/Container/container-station-data/lib/docker/volumes/mongodb/:/data/configdb
    restart: unless-stopped
Container Station now creates two new containers and installs the necessary files. This takes some time. After this, UniFi is not yet able to connect to the database, because we need first to setup an user and grant some rights.


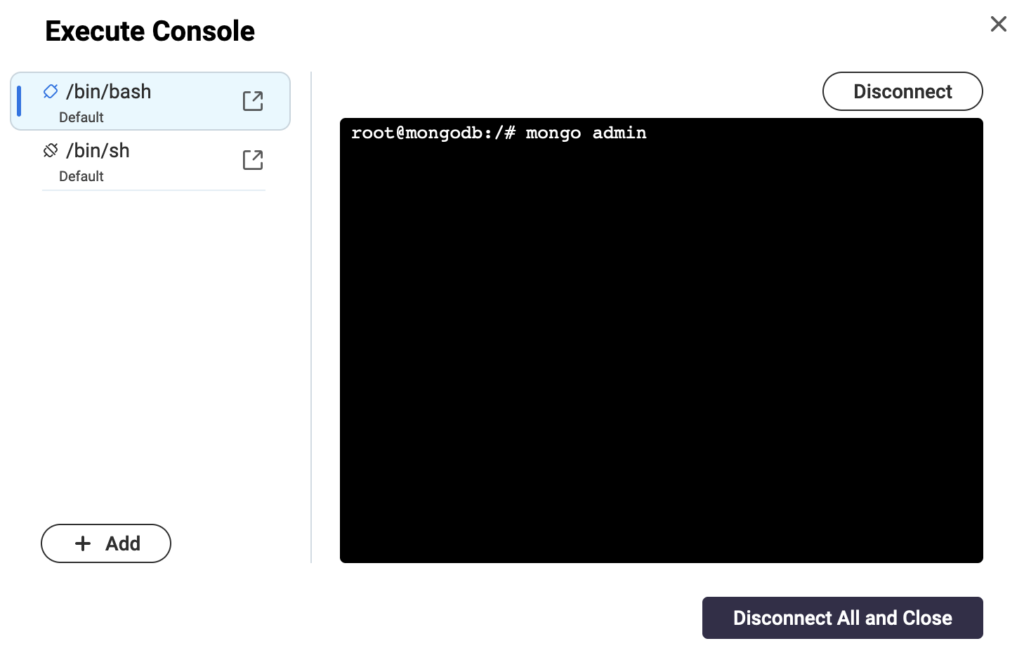
Click on “Containers” and then on the “mongodb” container. Click on “Execute”, choose /bin/bash and execute again. You are now connected to the terminal in this container.

Enter the following to connect to mongodb shell and create the unifi user.
Modify the password “UNIFIPASSWORD” to match the password in the yaml code.
mongo admin
db.getSiblingDB("unifi").createUser({user: "unifi", pwd: "UNIFIPASSWORD", roles: [{role: "dbOwner", db: "unifi"}]});
db.getSiblingDB("unifi_stat").createUser({user: "unifi", pwd: "UNIFIPASSWORD", roles: [{role: "dbOwner", db: "unifi_stat"}]});
quit();
The user is now created.
It takes now again a few minutes to fill the database.
After this, you should be able to conntect to your UniFi Network Server on https://<nas-ip>:8443
You can then import a backup or create a new config.
To adopt existing UniFi AP’s you could ssh into them and replace the inform-URL with:
set-inform http://<nas-ip>:32778/inform
And here are some helpful docker commands which can be executed from the ssh shell of your NAS:
Show running containers: docker ps
Start/stop/restart containers: docker start/stop/restart <containerName>
Show mounted volumes of a container: docker inspect -f ‘{{ .Mounts }}’ <containerName>
Show container config: docker inspect <containerName>
List networks: docker network ls
Show network config: docker network inspect <networkName>
Updating:
If you want to update your UniFi Network Server, go to the Application and click on the cogwheel. Choose “Recreate” and you will be able to recreate the containers with the newest docker image. The data stays on the mounted volume as long as you don’t delete any volumes.
You can also anytime get a backup from the UniFi Network Server Config, delete everything and recreate the containers as described. Then just upload your backup.
Thanks, the approach of manually setting up the mongo user & databases from the docker bash shell was a great help. Solved the problem I was having in not being able to get the scripts to run from with docker-compose.yml (following the official instructions on the linuxserver Github page.
Hi Chris! I’m glad it helped you.
I had the same problem, this is why I did it manually 🙂
Have fun with your unifi setup.
No worries,
Stefan
Thanks for the description. I managed using your method to get Unifi up and running on my Qnap and imported backup settings.
However, after login, Unifi displays my config and devices, but doesn’t find any. All appear ‘offline’.
My Qnap runs in IP range 192.168.2.100 and my USG gateway is 192.168.2.1
Must I enable something or forward some ports in container station in de docker containers?
Any thoughts what is going on?
*I’m not a docker expert.
Thanks
Hi Robert!
Did you change the inform-url on the Devices to the new URL and Port of the UniFi Network Server?
-> “To adopt existing UniFi AP’s you could ssh into them and replace the inform-URL with::32778/inform”
set-inform http://
If you do not have any other firewalls enabled on the QNAP, the port forwarding is already done in the “ports:” section of the YAML-config, there is nothing more to be done.
Hello,
thank you very much for the great description. I followed this and was able to set up my UniFi controller with it.
However, I noticed that after an update of my QNAP and the ContainerStation software, the data from the UniFi controller was gone again and I had to completely reconfigure everything. What could that be about?
Wohoo, sorry for my late reply 🙂
It could be that the configuration got broken during the update, I believe that your data was still around, but not found by the container. I would recommend doing backups of your config. With this it’s easy to rebuild the container and restore your data in a few minutes. Btw: I never had such a behavior until now and I did a few updates meanwhile.
Trying to update my controller gives me the following error message, any idea what this could be? Not sure why it says 0.0.0.0:8443
Error 2025-03-31 19:26:05 administrator — Container Station Docker Compose version v2.29.1-qnap2 Container Station Applications [Container Station] Failed to create application “unifi-docker”. Error message: operateApp action [–project-name unifi-docker up -d –remove-orphans] failed: exit status 1: time=”2025-03-31T19:26:02+02:00″ level=warning msg=”/share/CACHEDEV1_DATA/.qpkg/container-station/data/application/unifi-docker/docker-compose.yml: the attribute `version` is obsolete, it will be ignored, please remove it to avoid potential confusion”
Network unifi-docker_default Creating
Network unifi-docker_default Created
Container mongodb Creating
Container mongodb Created
Container unifi-network-application Creating
Container unifi-network-application Created
Container mongodb Starting
Container mongodb Started
Container unifi-network-application Starting
Error response from daemon: driver failed programming external connectivity on endpoint unifi-network-application (82b0dae91386c15c2b26a8a2aefefabe64f0548c6fc11fadce396446686a1183): failed to bind port 0.0.0.0:8443/tcp: listen tcp4 0.0.0.0:8443: bind: address already in use
I’ve had the controller running with your guide for a while now but trying to update today gives me the following error message. Not sure why it says 0.0.0.0:8443…
Error 2025-03-31 19:26:05 administrator — Container Station Docker Compose version v2.29.1-qnap2 Container Station Applications [Container Station] Failed to create application “unifi-docker”. Error message: operateApp action [–project-name unifi-docker up -d –remove-orphans] failed: exit status 1: time=”2025-03-31T19:26:02+02:00″ level=warning msg=”/share/CACHEDEV1_DATA/.qpkg/container-station/data/application/unifi-docker/docker-compose.yml: the attribute `version` is obsolete, it will be ignored, please remove it to avoid potential confusion”
Network unifi-docker_default Creating
Network unifi-docker_default Created
Container mongodb Creating
Container mongodb Created
Container unifi-network-application Creating
Container unifi-network-application Created
Container mongodb Starting
Container mongodb Started
Container unifi-network-application Starting
Error response from daemon: driver failed programming external connectivity on endpoint unifi-network-application (82b0dae91386c15c2b26a8a2aefefabe64f0548c6fc11fadce396446686a1183): failed to bind port 0.0.0.0:8443/tcp: listen tcp4 0.0.0.0:8443: bind: address already in use
Hi Senna
failed to bind port 0.0.0.0:8443/tcp: listen tcp4 0.0.0.0:8443: bind: address already in use
-> It says that there is already a service bound to this port 8443.
Check if you have other applications already running on this port or choose a different one.