Note 12.01.2020: Updated instructions and printscreens for Wireshark v3.0.
Firefox, Chrome and curl offer the possibility to save the session-keys for https connections. Just set the environment variable “SSLKEYLOGFILE” to a file where you want to store the keys. We do not need to start a man in the middle (mitm) proxy.
Example for MAC OS, execute this in the Terminal:
export SSLKEYLOGFILE=/Users/username/Documents/sslkeylog.log
Then start your Browser (Chrome, Firefox) or curl from the same Terminal-Session.
open -n /Applications/Firefox.app
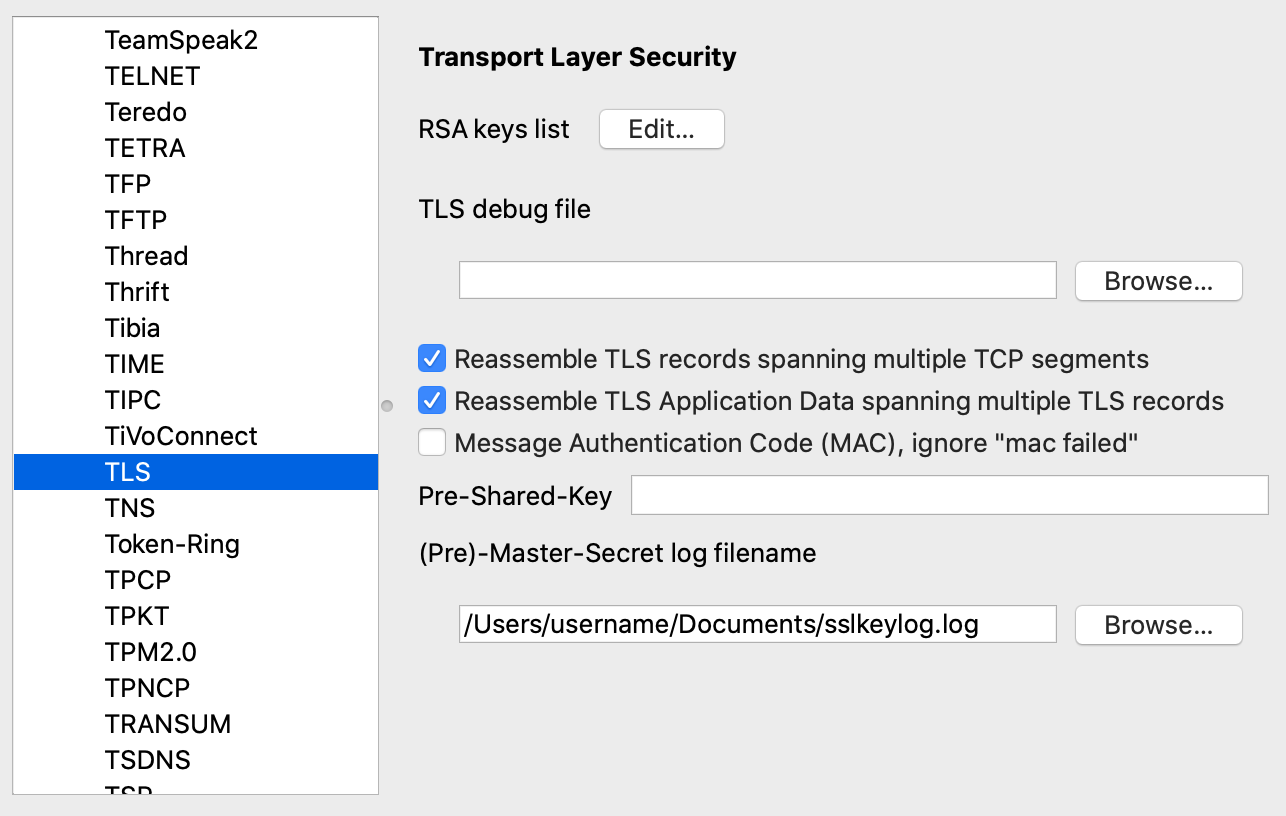
Now start Wireshark, and go to “Preferences” -> “Protocols” and choose “SSL”. Set the Path to your keylog-file. This tells wireshark to read the Keylog-File for decrypting the captured traffic.
[NOTE:] Since Wireshark 3.0, the TLS dissector has been renamed from SSL to TLS.
The following TCP protocol preferences are also required to enable TLS decryption:
– Allow subdissector to reassemble TCP streams. Enabled by default.
– Reassemble out-of-order segments (since Wireshark 3.0, disabled by default).
Now start capturing and see the decrypted traffic. Easy hm?
I made me a script which sets the variable, opens Firefox and Wireshark:
#!/bin/bash
export SSLKEYLOGFILE=/Users/username/Documents/sslkeylog.log
open -n /Applications/Firefox.app
open -n /Applications/Wireshark.app
This works the same way on Windows and Linux. On Windows you need the SET command or create a new environment variable in “Control Panel” -> “System” -> “Advanced System Settings” -> “Environment Variables”. Create a new one with name “SSLKEYLOGFILE” and the path to your logfile as value.
Links:
– https://wiki.wireshark.org/TLS

Good to know 😉